Liberating my X200
Published 2022-10-23 on Yaroslav's weblog
I had wanted to libreboot my trusty old Thinkpad X200 for quite sometime. Only recently did I get around to librebooting mine. Even though the information on how to do it is out there and quite good, some of it is spread throughout the internet and didn't all completely apply to my particular case, hence I decided to write this post on how I went about flashing Libreboot on my X200.
I had been wanting to flash Libreboot on my X200 ever since I got it, but only recently did I get around actually doing it. The process isn't hard at all, you don't need any special skills besides knowing how to use the Linux command line and not being afraid to open your laptop and connecting some wires to it.
There's many reasons to want to install Libreboot or Coreboot, some which are faster boot times, custom payloads, and of course, muh freedumbs. I was mainly looking for faster boot times and having an almost completely free and open source laptop without backdoors, i.e. Intel ME1.
For this I used a CH341A programmer. Yes, the official Libreboot site2 warns against using it, but really it just because of a batch of faulty boards that deliver 5V instead of 3.3V on the 3.3V pin. That said, if you have a multimeter lying around it quite easy to make sure that you have a proper CH341A with 3.3V DC instead of 5V. After plugging my multimeter I found that mine was fine and so I proceeded to use to flash my laptop.
Most Thinkpads out there have 16 pin SPI chip, and that's why most information out there is about them, but mine had an 8 pin. In my case that was better for me, since the CH341A I bought came with a SOIC8 clip, so I didn't have to buy a separate clip. I did end up desoldering the cables that came attached to the clip since I wanted to use jumper female-female cables to connect the clip to the CH341A.
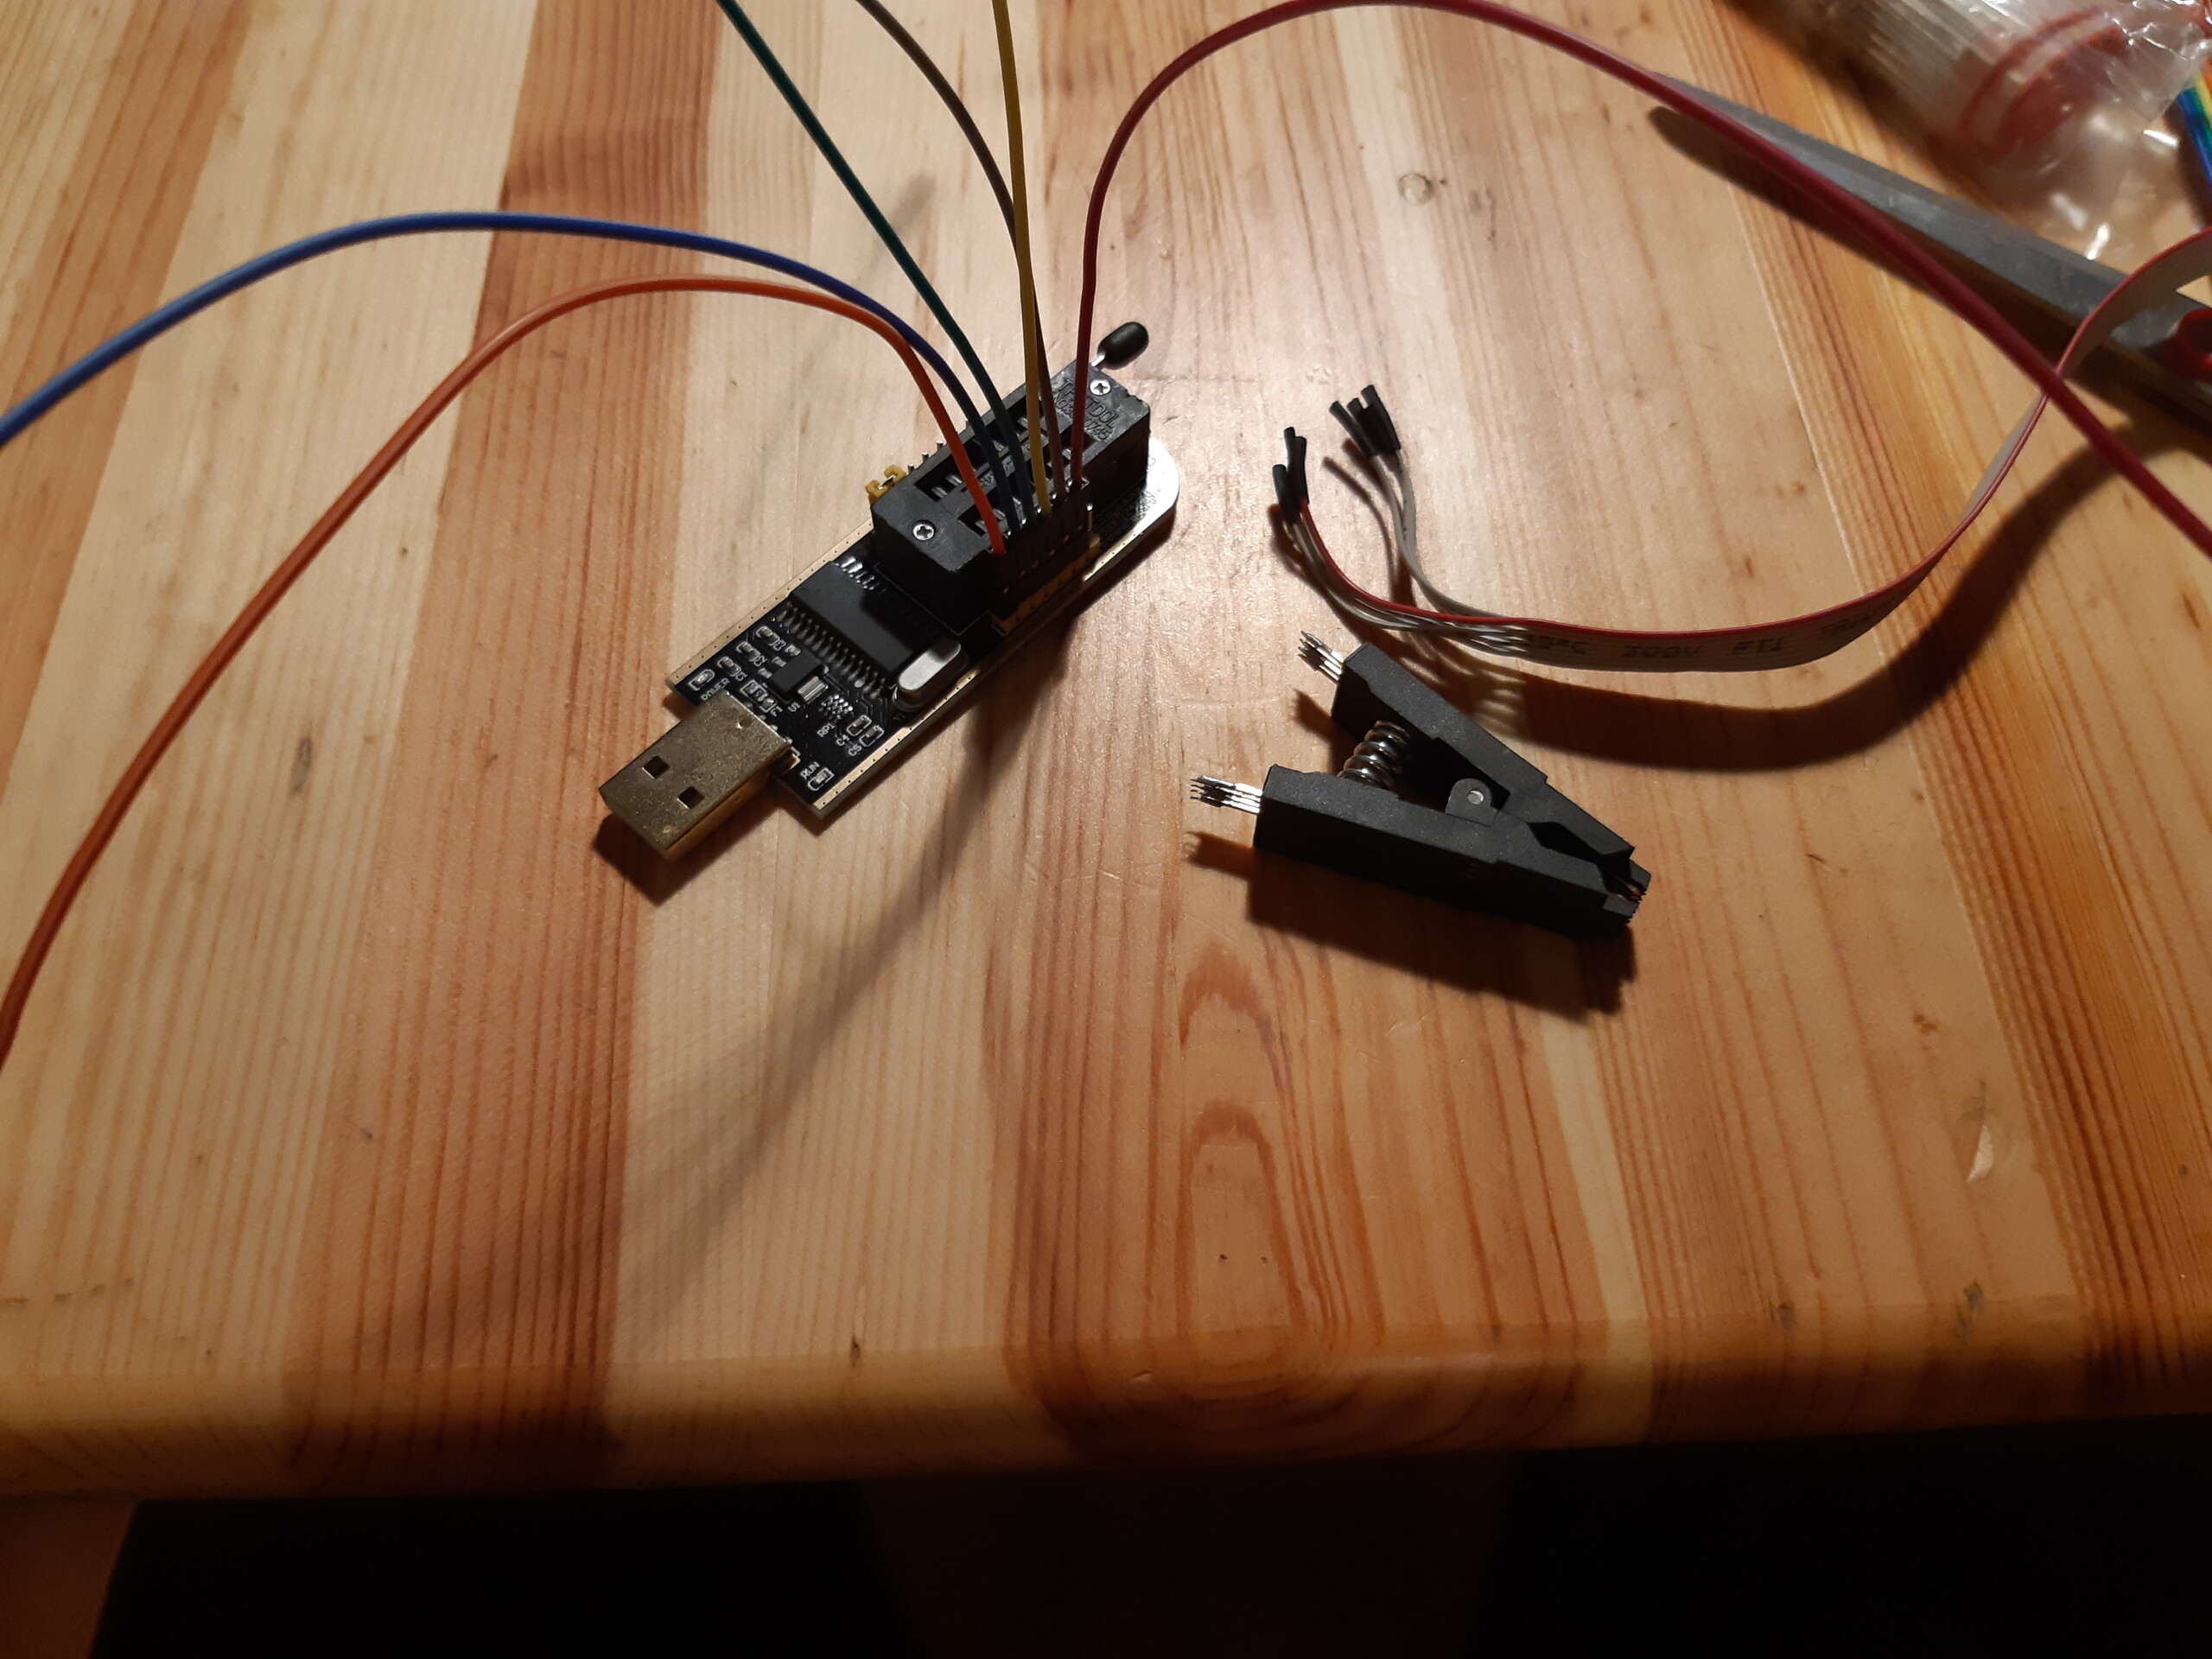
Unsoldered SOIC8 clip next to the CH341A with jumper cables already connected to the board.
After unsoldering the clip, I went ahead and opened my laptop. It's only necessary to remove the keyboard and palmrest to get access to the chip. Removing the keyboard and palmrest assembly is really easy. The only thing that you need to do is unscrew 8 phillip-head screws which are marked with the palmrest and the keyboard icons, the push the keyboard towards the screen pull it up, disconnect it and next lift off the palmrest. You might need to also disconnect the fingerprint reader if you have one, mine doesn't so I didn't have to. Also, don't forget to remove the laptop battery and disconnect the CMOS battery.
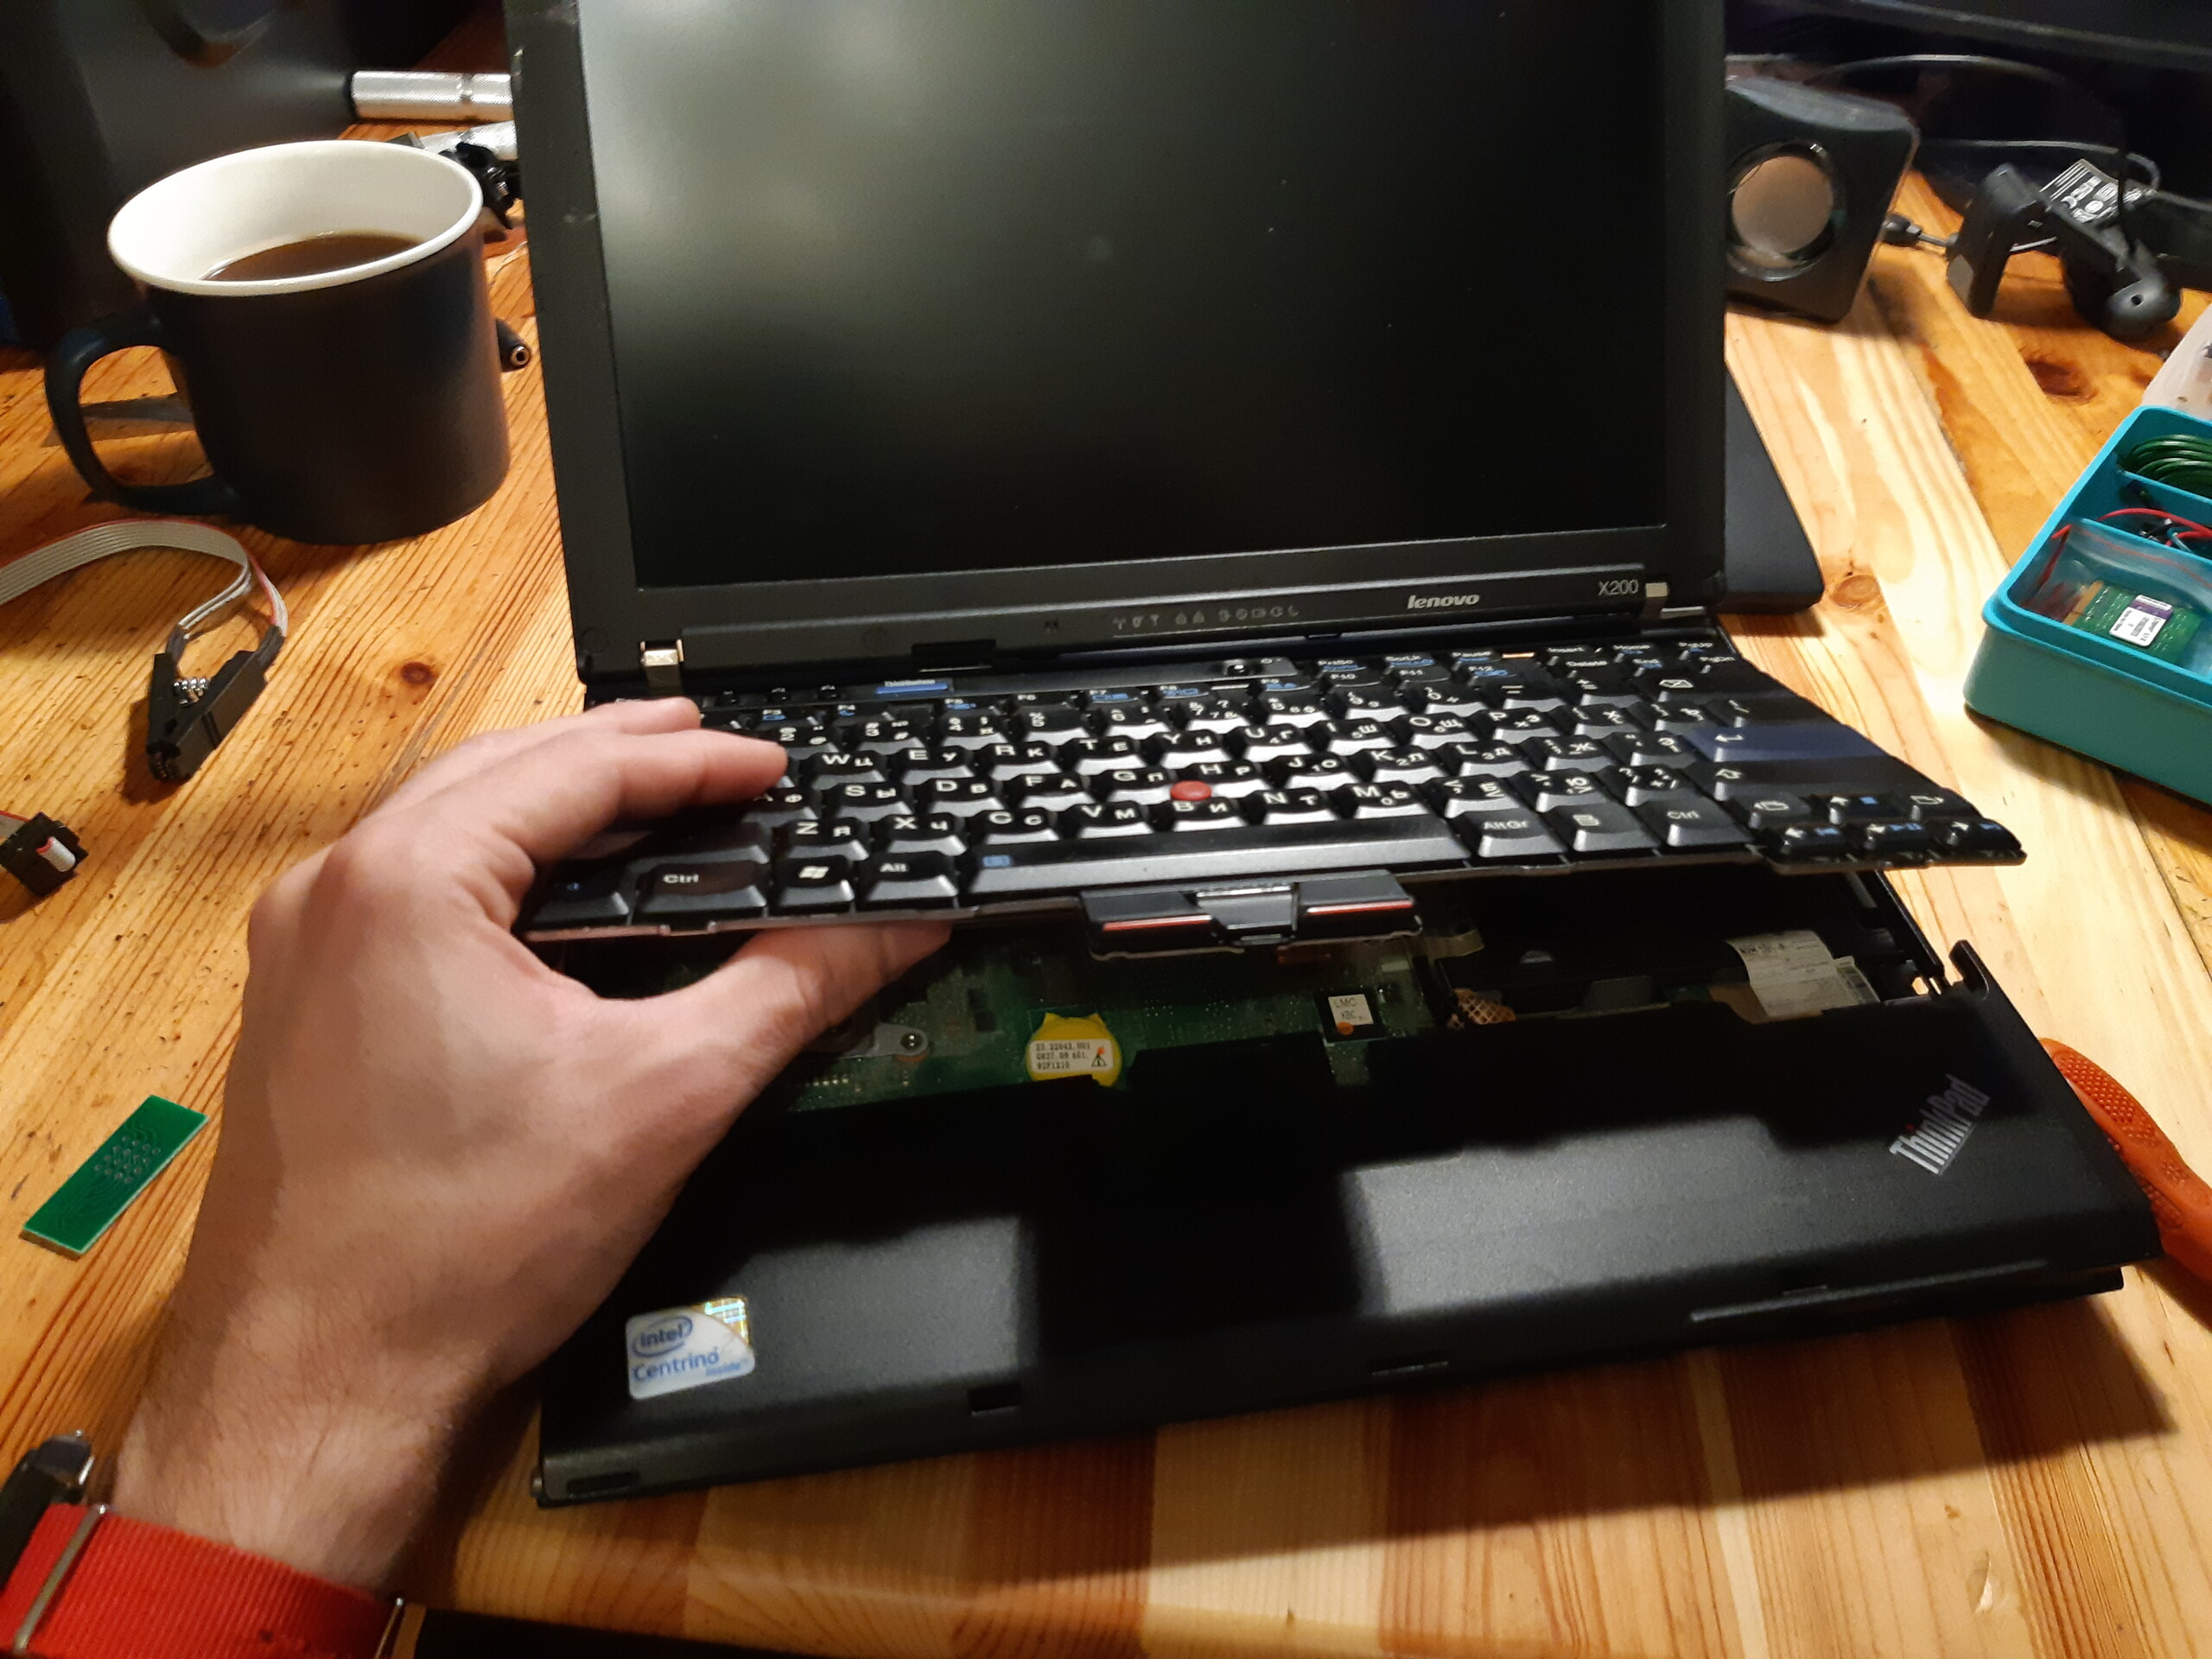
Removing the keyboard and palmrest.
After getting the keyboard and palmrest out of the way, there was the chip. All of those chips have a dot indicating pin 1. It's important to locate pin 1 in order to know how to properly connect the pins to the flashing board. The scheme is as follows:

Wire all of the pins on the chip to the following pins on the CH341A:
- CS
- MISO/MIOS
- unused
- GND
- MOSI
- CLK
- unused
- 3.3V
After wiring up properly the clip to the CH341A, I proceeded to secure the clip to the chip by making sure that pin 1 was correctly wired to CS on the CH341A. Then, after making sure that the clip was properly and securely in place, I proceeded to connect the CH341A to the host computer from which I would be flashing. It's very important to first connect the clip and then the board to the host, otherwise you risk frying your chip and bricking your laptop!
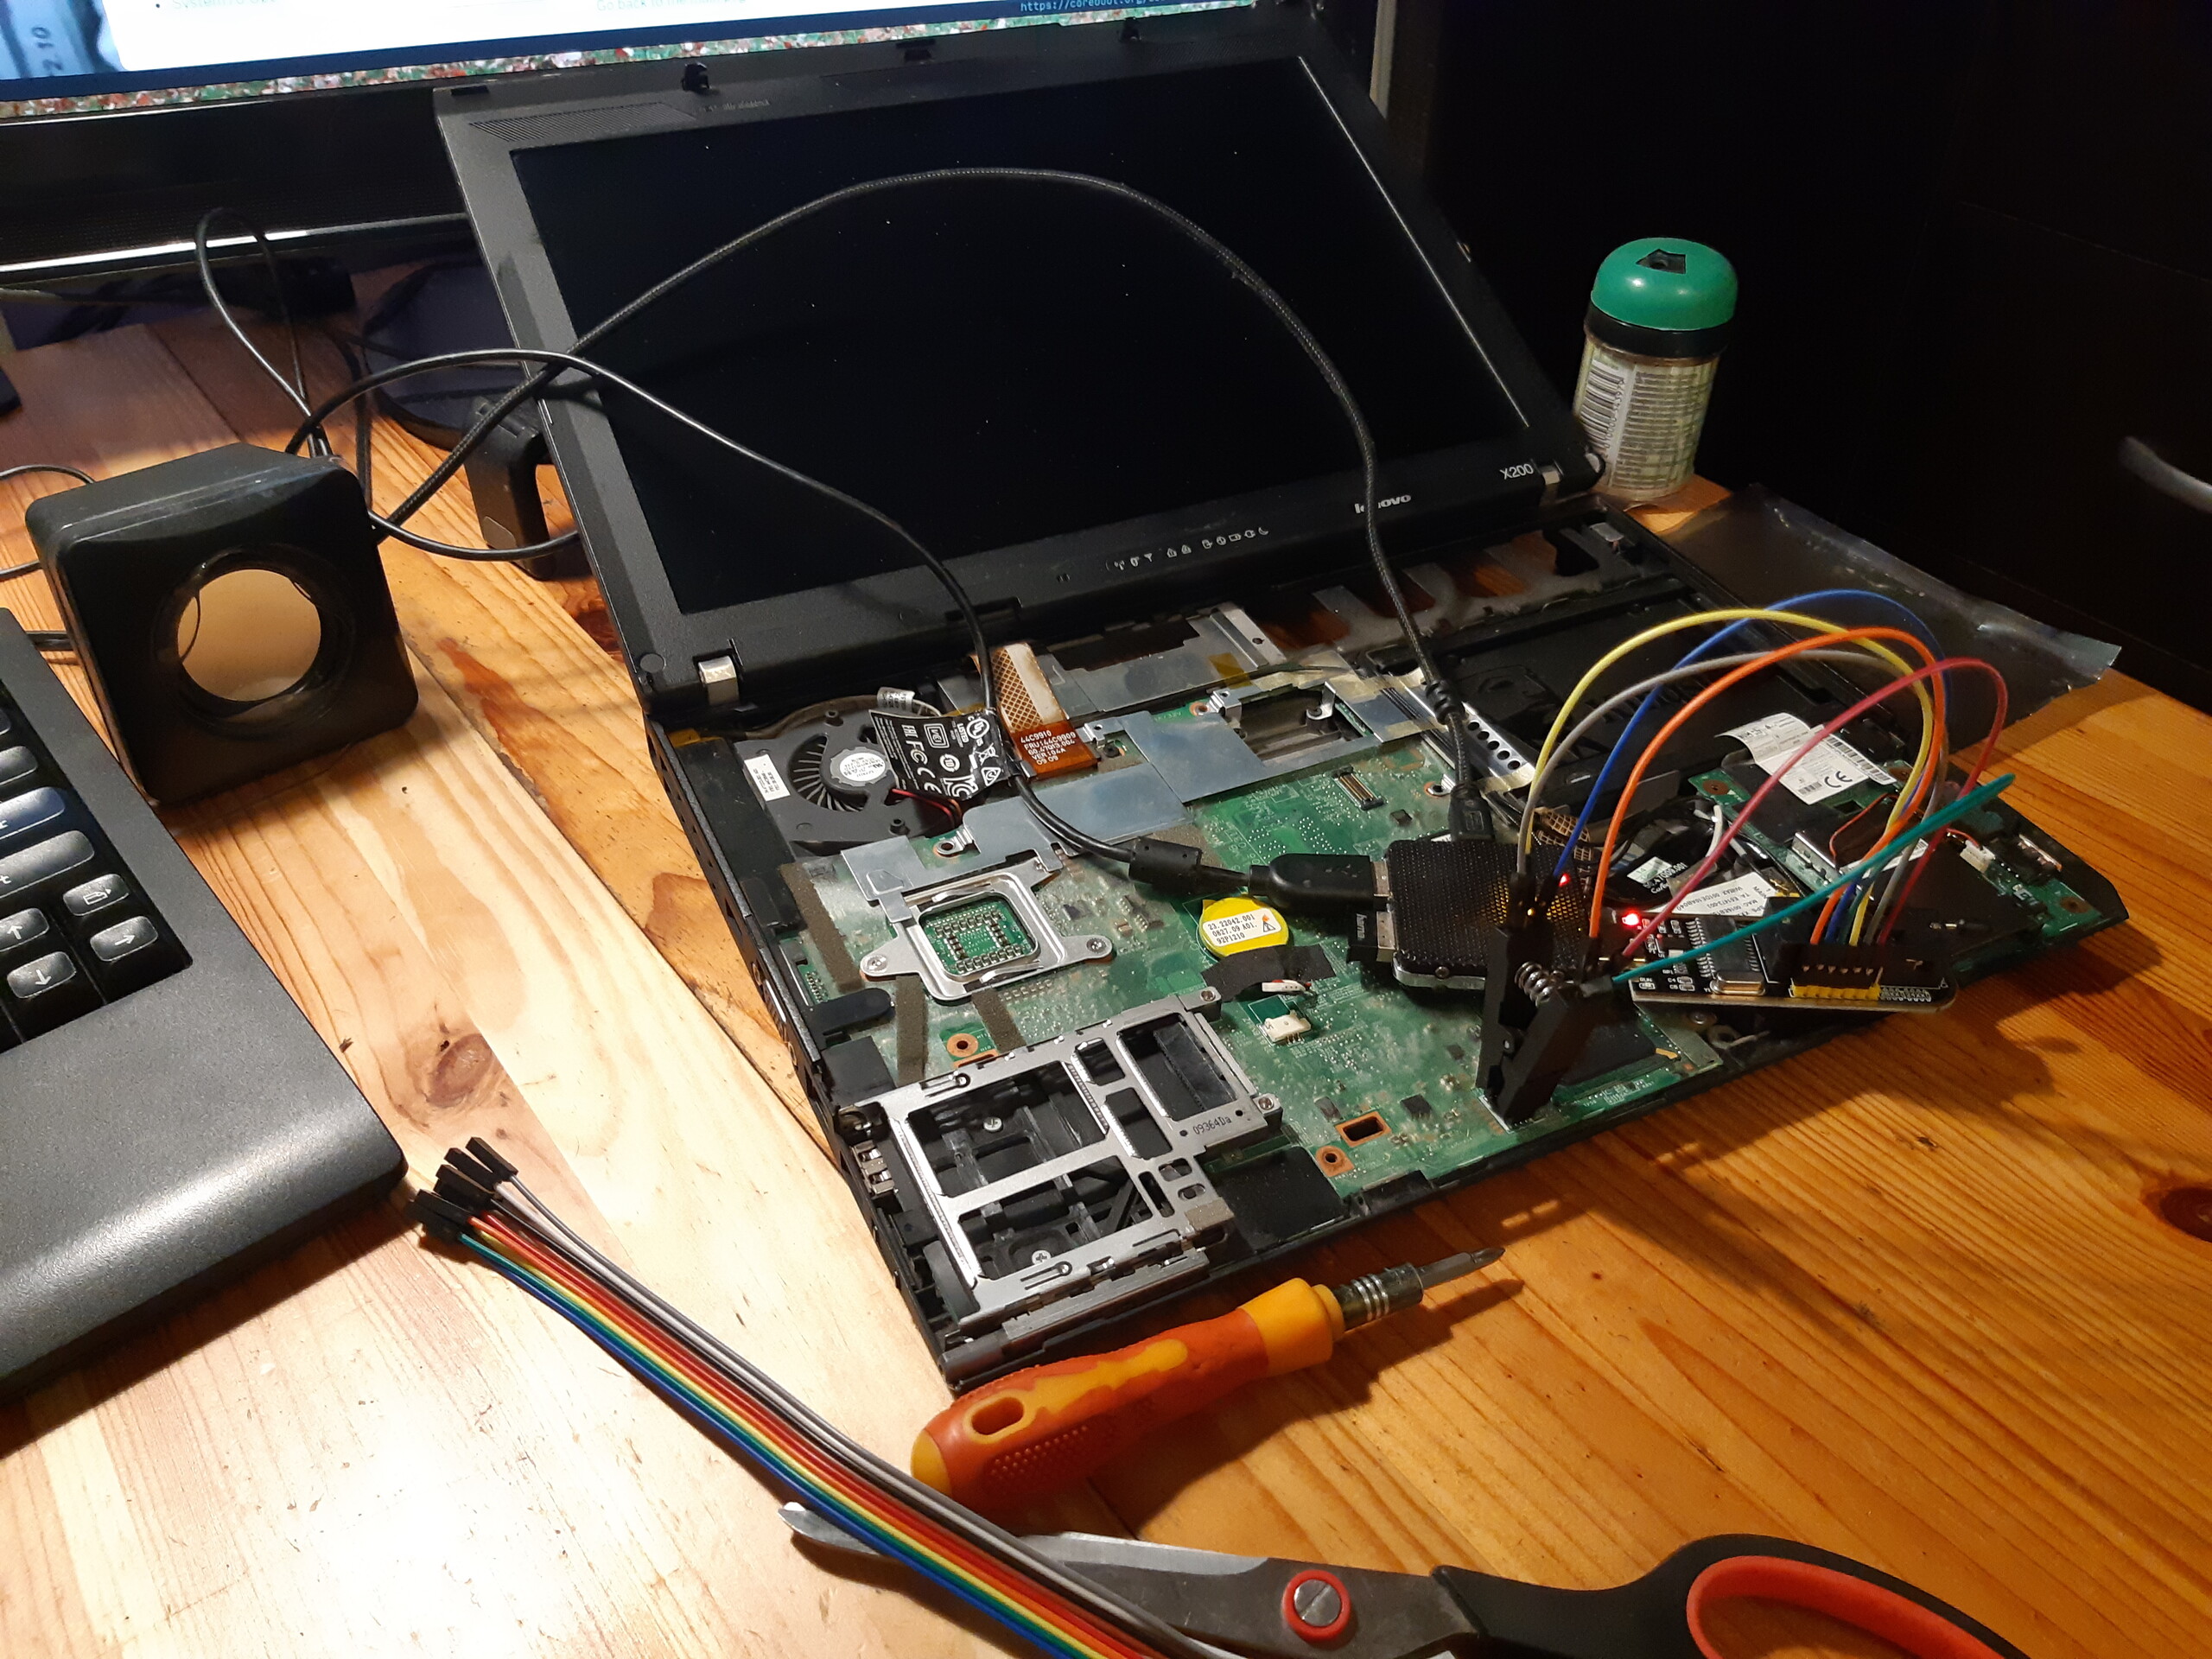
CH341A connected to the chip and host computer.
For reading and flashing SPI chips, a program called flashrom is needed, which is available in most distributions' repos.
After I checked dmesg to see that the CH341A properly recognized by the host, I went ahead and proceeded to dump the original firmware. I did this twice to run a diff on both dumps and make sure that I was getting correct readings before actually flashing the Libreboot image:
# flashrom -p ch341a_spi -r bak1.rom
...
# flashrom -p ch341a_spi -r bak2.rom
...
# diff bak1.rom bak2.rom
I got an empty output from diff, which means that the two reads were identically, and so I could continue with more confidence that I wouldn't brick my laptop. Also, from the output, I could gather that my chip was a 4mb one, so the image that I downloaded was the 20220710 4mb release for the X200. All Libreboot images can be downloaded from here: https://libreboot.org/download.html.
I chose to install the one with grub as first payload and SeaBios as secondary since I only use Linux. After choosing and downloading the image I proceeded to flash it:
# flashrom -p ch341a_spi -w grub_x200_4mb_libgfxinit_corebootfb_usqwerty.rom
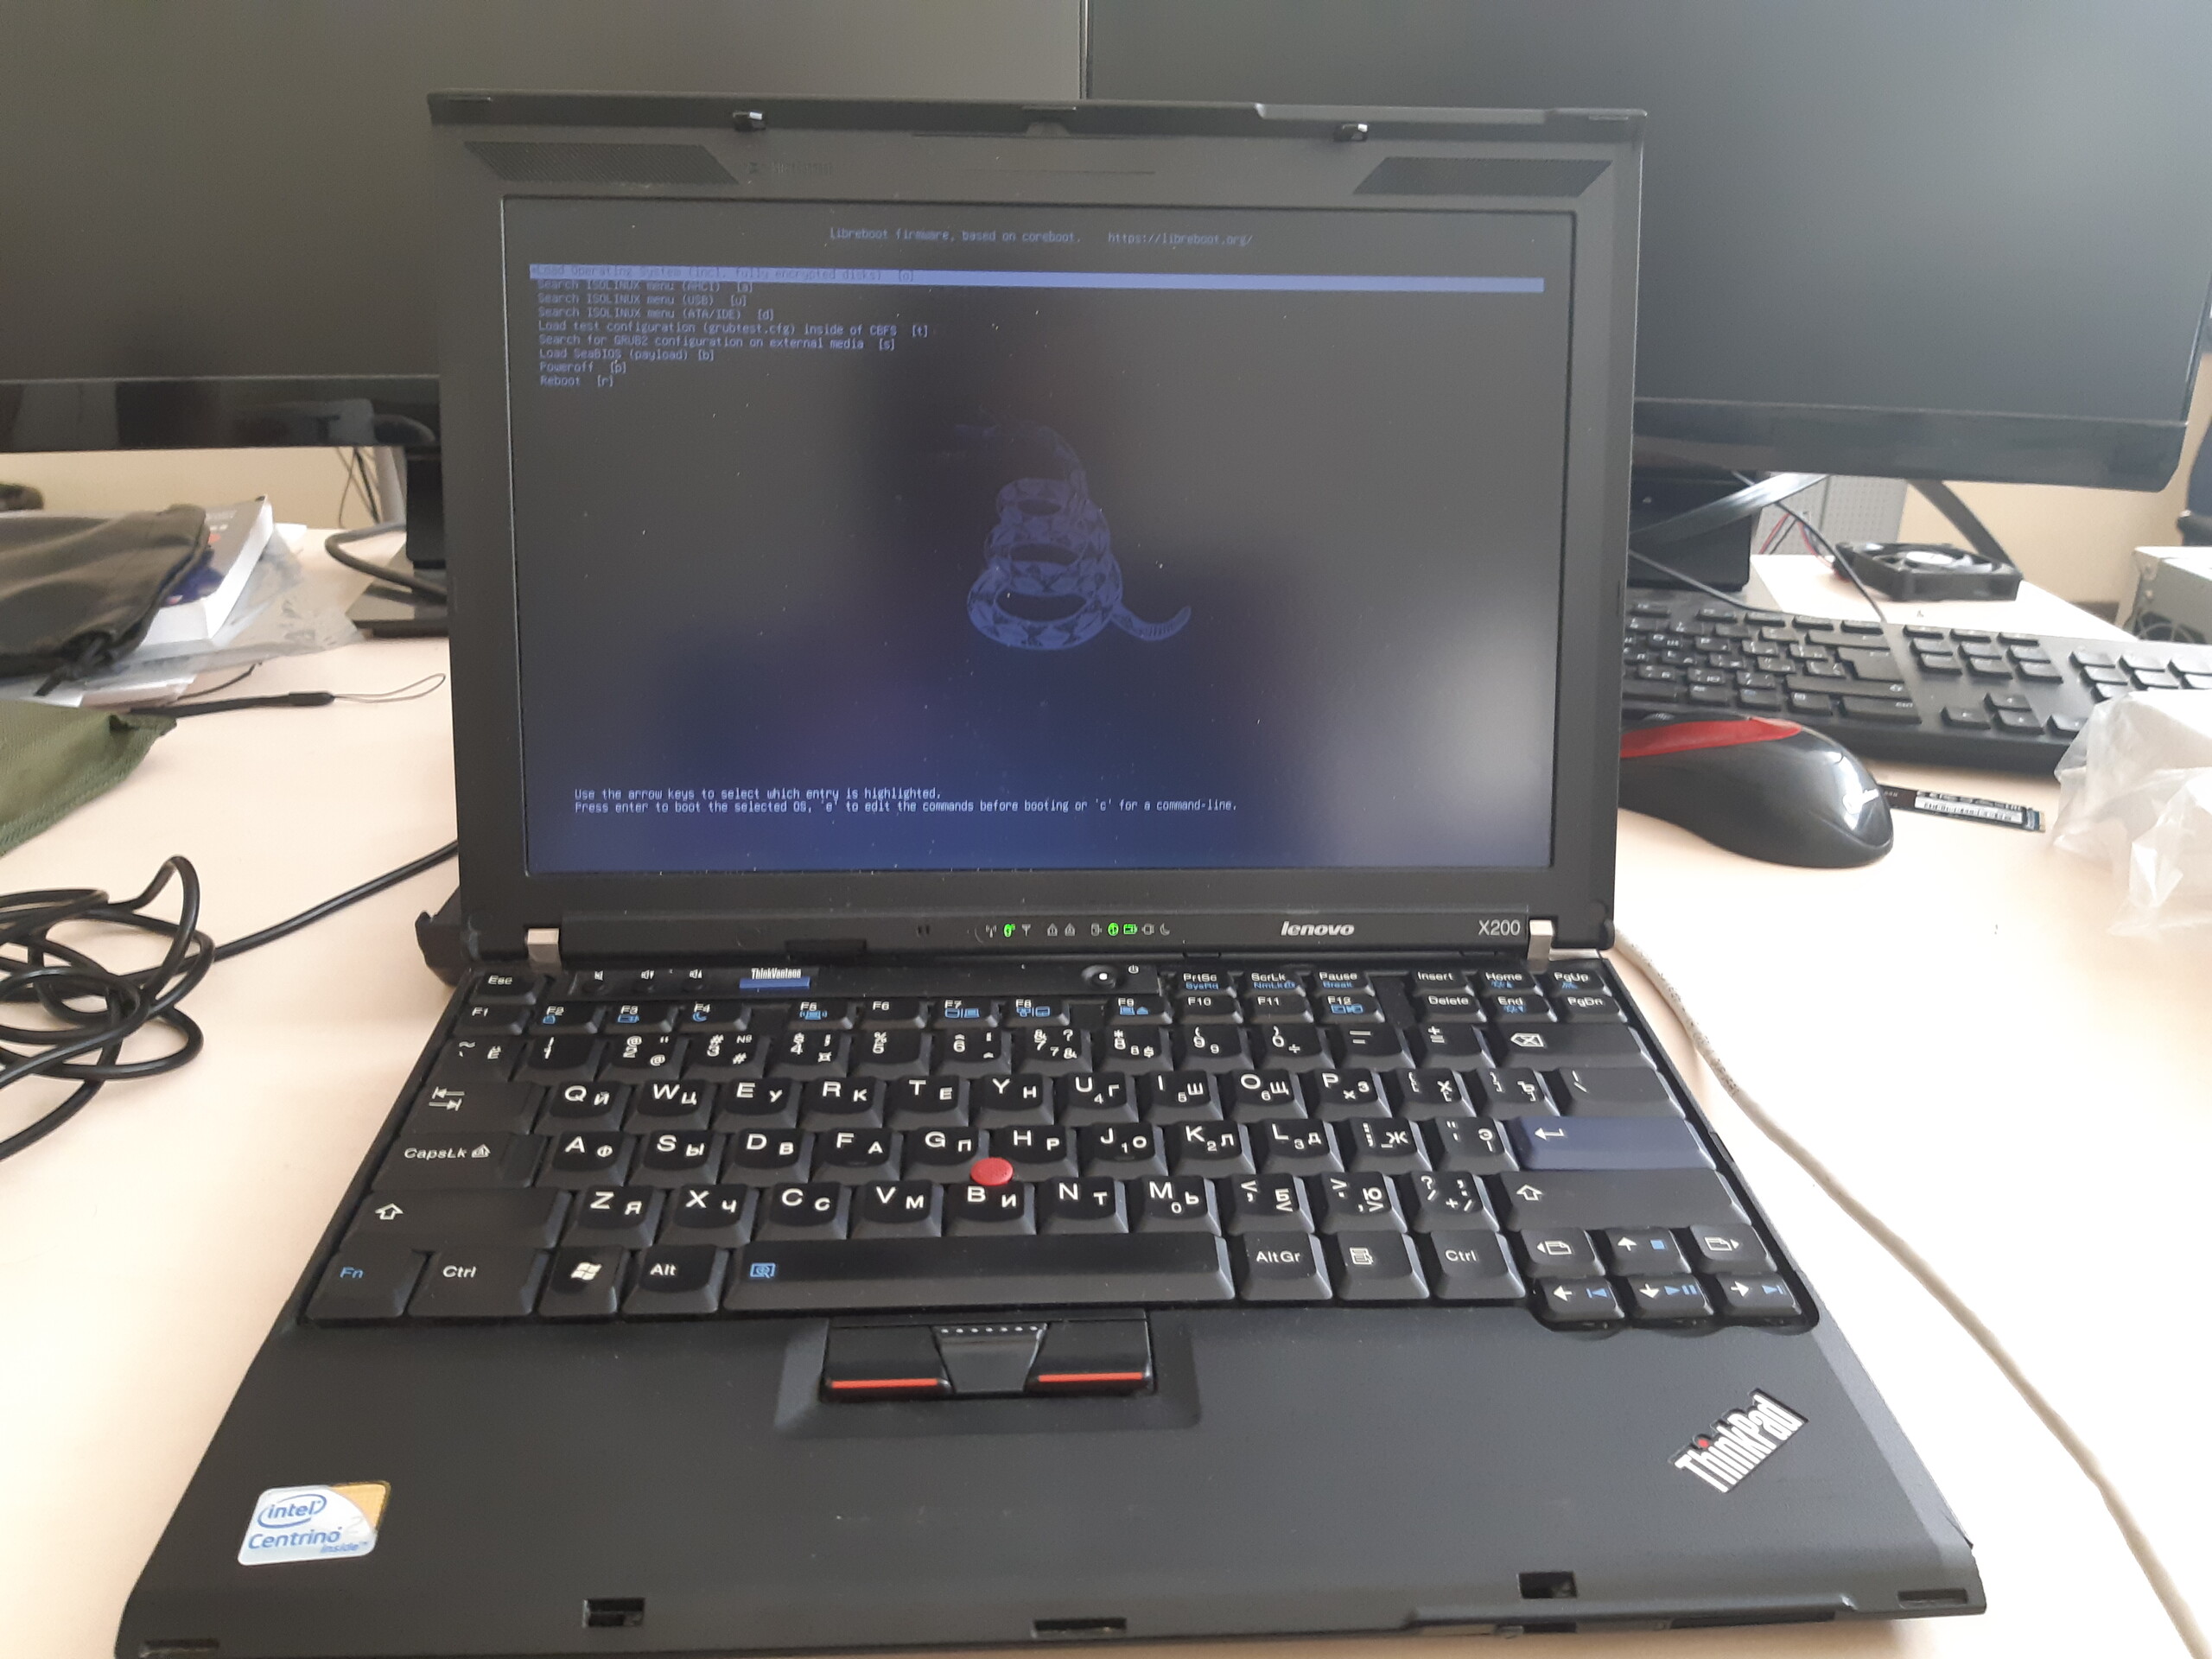
After a couple of minutes of flashing it was done. I was now able to fully enjoy muh freedumbs. I assembled back the computer and booted it up and there it was, the libreboot grub menu greeting me.
Everything was fine until the computer froze, I rebooted it and was greeted by some weird noise on the screen and nothing else. I fiddled around, dumped the chip to check it was correctly flashed (it was), tried different images, until it dawned on me that I had two different RAM sticks on my X200, a 4GB one and a 2GB one. After removing the 2GB one everything went back to normal.
Libreboot/Coreboot does indeed boot much faster than the native firmware. It even wakes up instantaneously from sleep, whereas with the native firmware it would take 1-2s seconds to do so. I also noticed slightly better graphics performance, which could be attributed to the bigger amount of RAM that is dedicated to iGPU with Libreboot compared to the native firmware.
Muh freedumbs!
That's it, it really is that easy. After flashing Libreboot it is possible to
flash the SPI chip using software only without having to use an external
flasher. It's as simple as using the flashrom program, except that you use -p internal to let know flashrom that you will be flashing the chip internally.
If you are interested in making any further modifications to your Libreboot image, it's best to read the official Libreboot and possibly Coreboot resources. If, for example, you want to change GRUB's background just as I did, you can read more about it here: https://libreboot.org/docs/gnulinux/grub_cbfs.html.
The Intel Management Engine is a secondary processor installed on all Intel chips from circa 2007 onwards. It runs its own OS and environment and has full control over the machine, furthermore it can't be officially disabled by the user, and requires measures such as flashing custom firmware or even soldering/desoldering certain components in order for it to be completely neutered. It's a huge security risk, but unfortunately one can't be easily mitigated and continues to be deployed like a virus in all modern x86 machines. Yes, AMD also has its own version of the ME called the PSP or Platform Security Processor. Another reason why closed proprietary systems are a bad thing for privacy, security and freedom.
https://www.yaroslavps.com/weblog/x200-libreboot/
© 2018—2026 Yaroslav de la Peña Smirnov.